AppUp is a low-code application development platform that allows developers to create cross-platform applications quickly and easily. It offers a set of services including front-end development, backend development, and databases that streamline the application development process. It allows businesses to reach a larger audience by deploying applications across multiple platforms and devices.
AppUp is built on top of the Apache Cordova open-source project, and its development environment includes HTML, CSS, and JavaScript. Developers who are already familiar with web technologies will find it simple to get started with AppUp. It includes several features that are intended to improve the efficiency and effectiveness of web app development. For example, it offers a unified development environment that enables developers to work on app projects from a single workspace, eliminating the need to switch between different development environments, and saving time and effort.
Overall, AppUp is a powerful and user-friendly app development platform that can assist you in creating cross-platform apps quickly and easily.
The cloud is an excellent way to supplement your computer's storage capacity. It's simple to use and accessible from anywhere. It helps in the management and organization of your development progress.
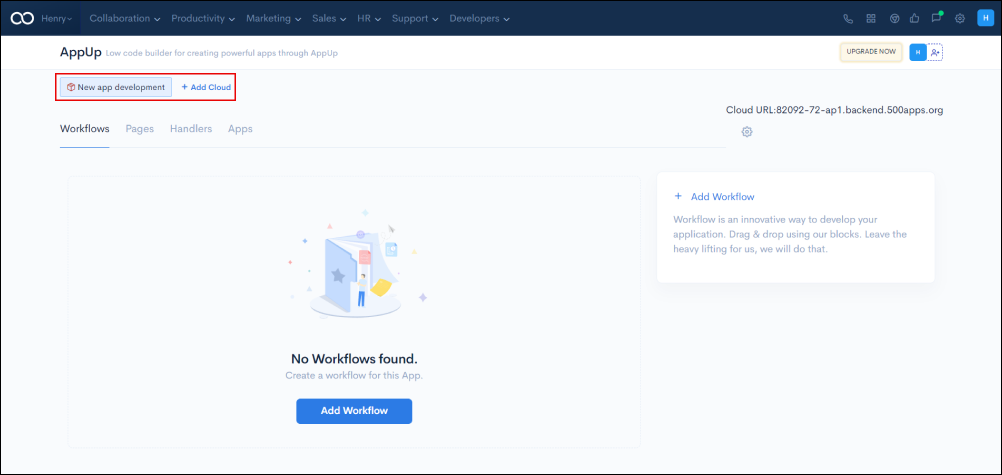
You can create a cloud by clicking on the Add Cloud button.

Start adding new clouds to the workspace by giving them a specific name, description, and unique icon.
![]()
Click on Add Member to add Cloud team members from the existing list or invite them through the mail. Assign specific roles to each member by adding them to the project. Once the members are chosen, click on Save.
By clicking on +Add Cloud, you can add as many clouds as you want.
You are now ready to get started!
Click on the settings icon on the top right to optimize the DNS settings.
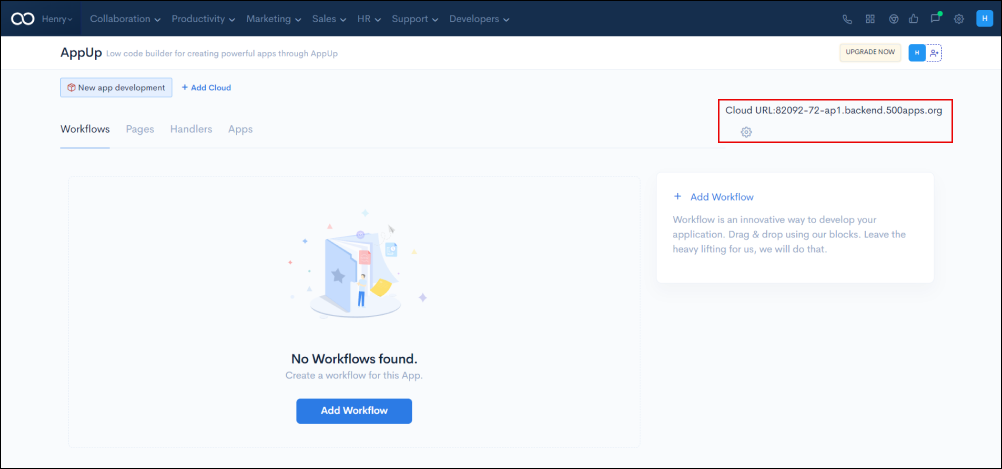
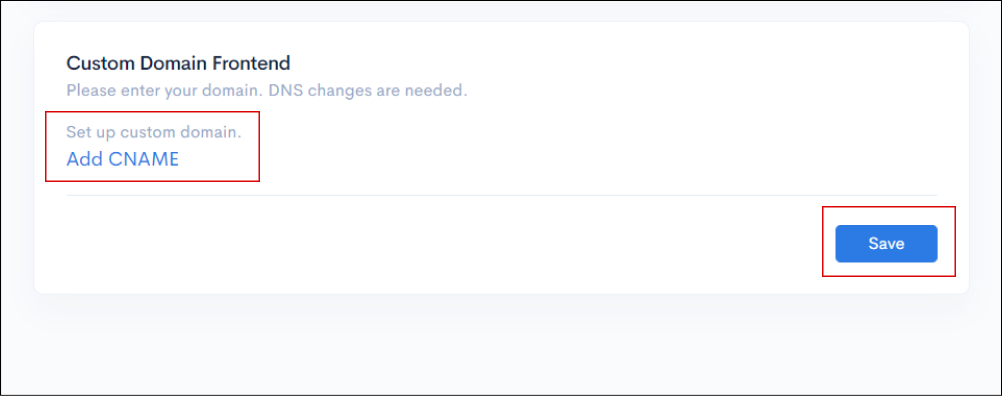
Custom domain names can be created for both the backend and the frontend in Domain Settings.
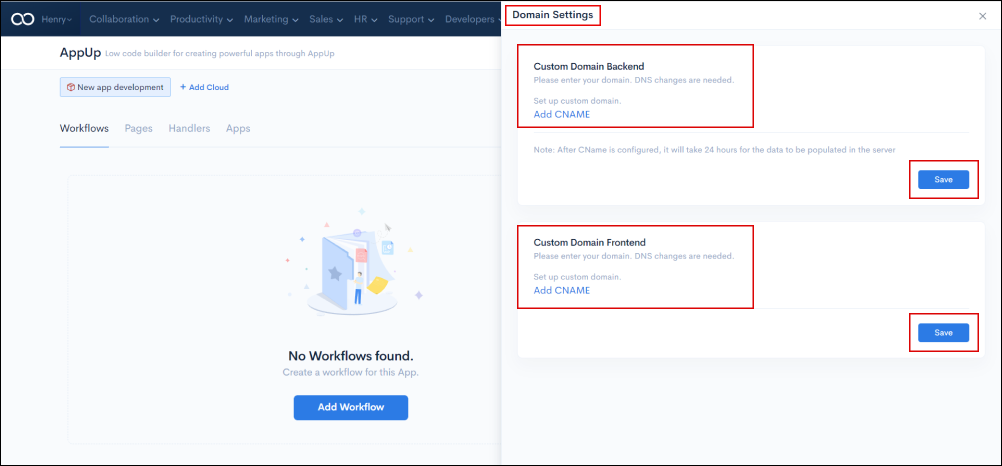
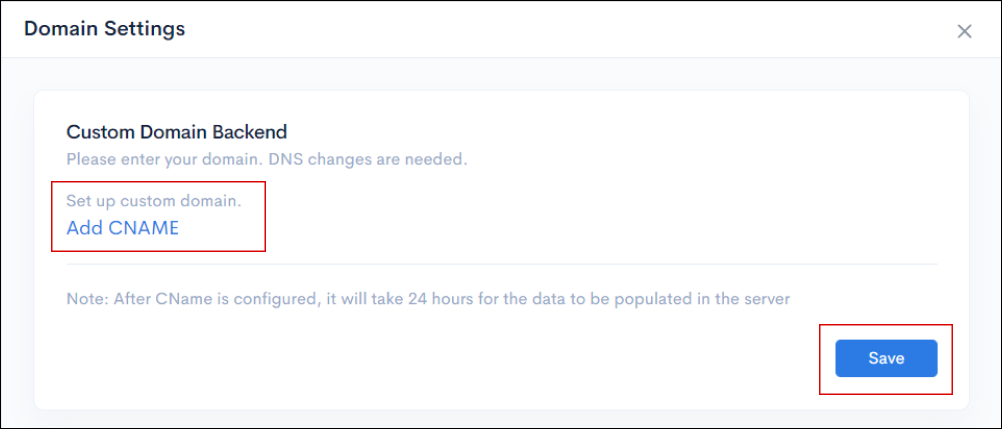
You can configure a custom domain by clicking Add CNAME.
You can configure a custom domain by clicking Add CNAME.
Adding CNAME:
To set up CNAME, Click on Add CNAME, enter your custom Domain URL, and then click Verify.
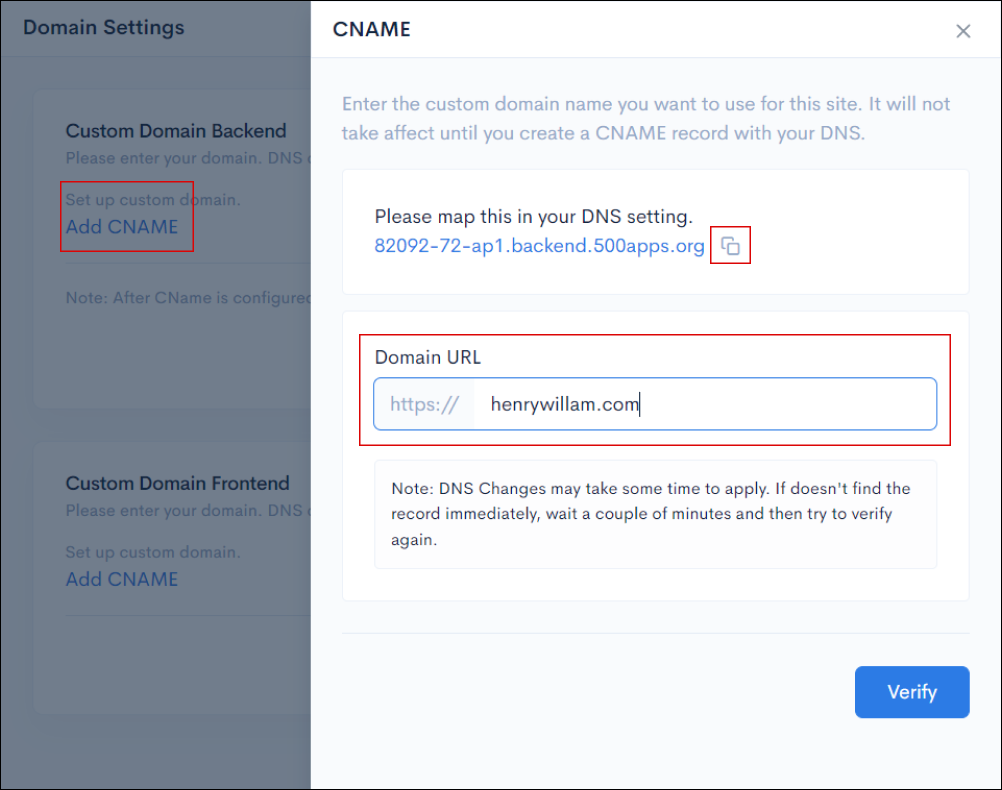
Enter the custom domain name you want to use for this site. It will not take effect until you create a CNAME record with your DNS.
Once the CName is configured, it will take 24 hours for the data to be populated on the server.
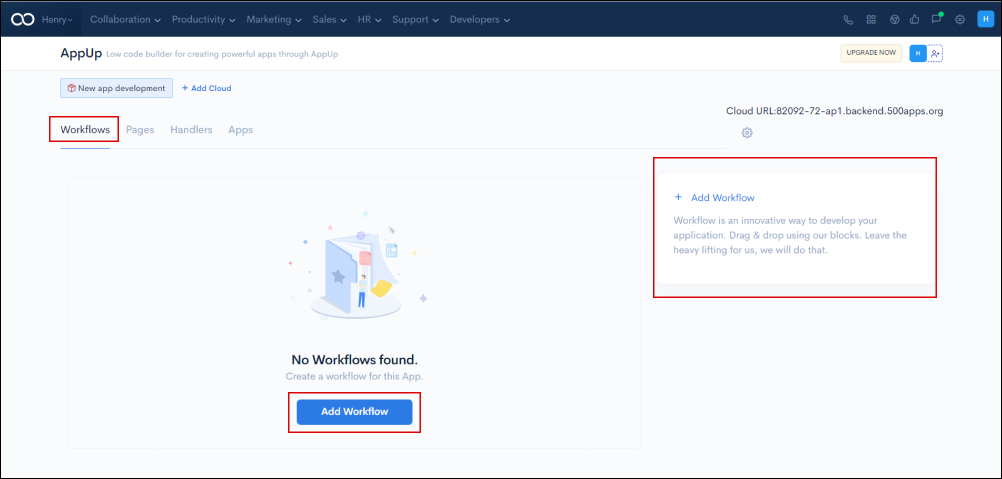
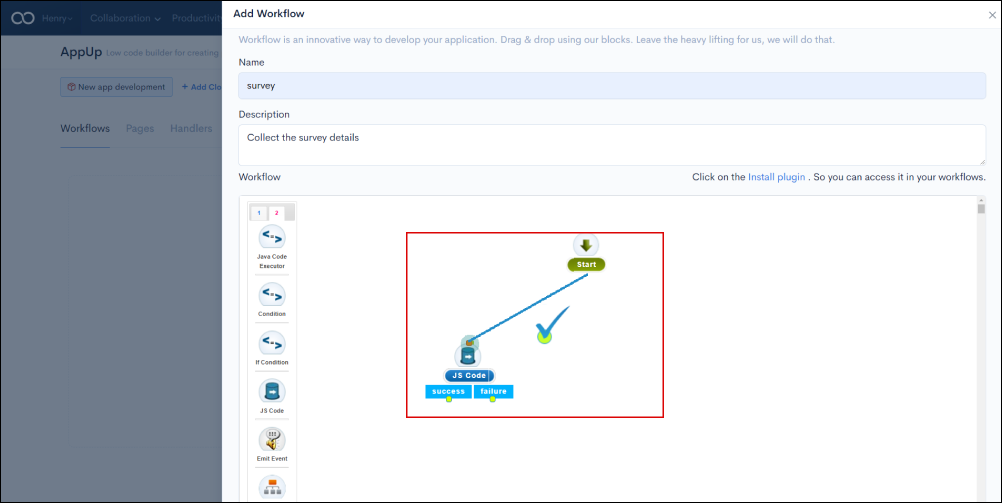
Workflow is an innovative way to develop your application with the use of drag-and-drop functionality.
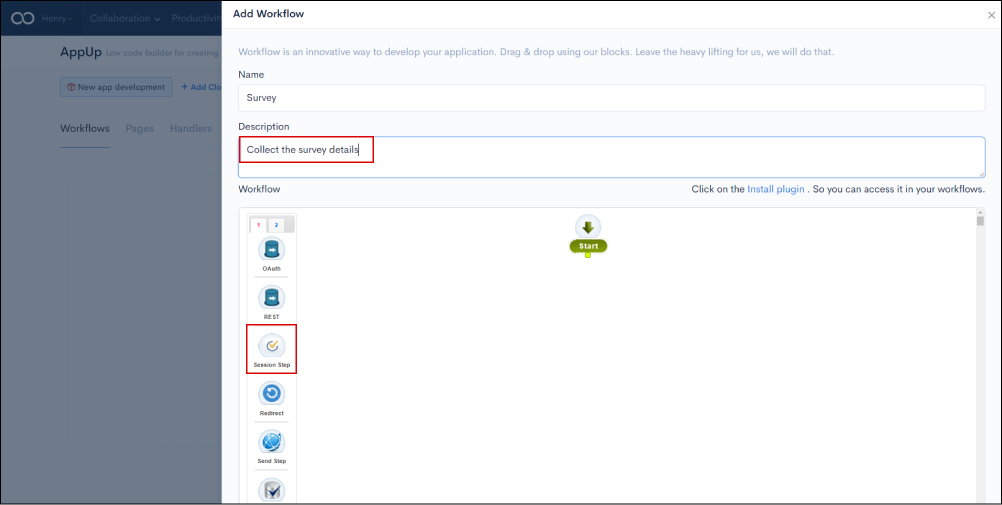
Click on Add Workflow to build an algorithm for an application.
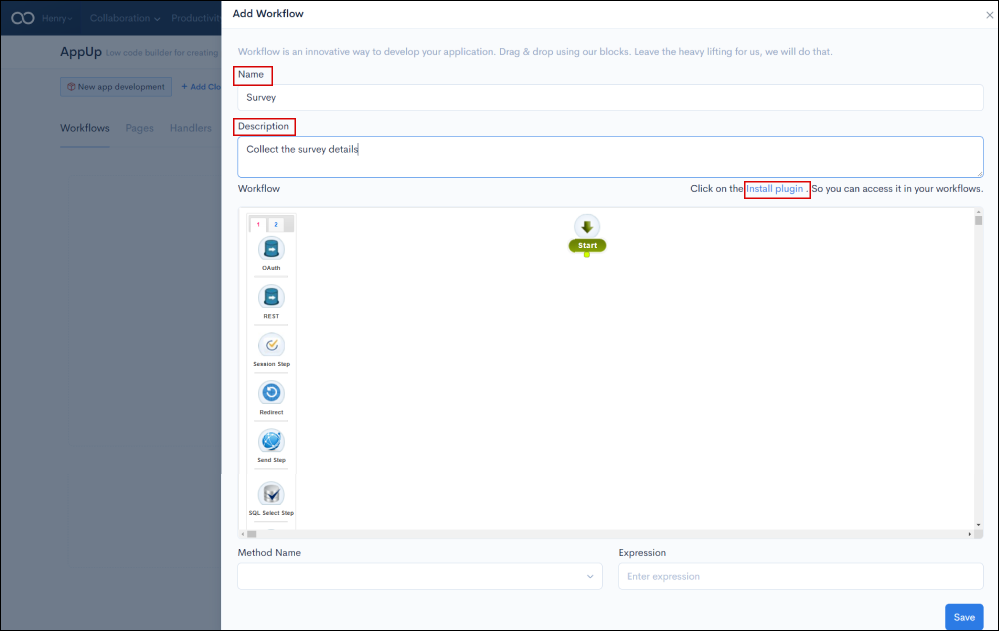
A pop-up window will appear, where you need to provide the details such as name, description, and more. In the Name field, enter any name of your choice for the application. In the Description section, add the details about the application.
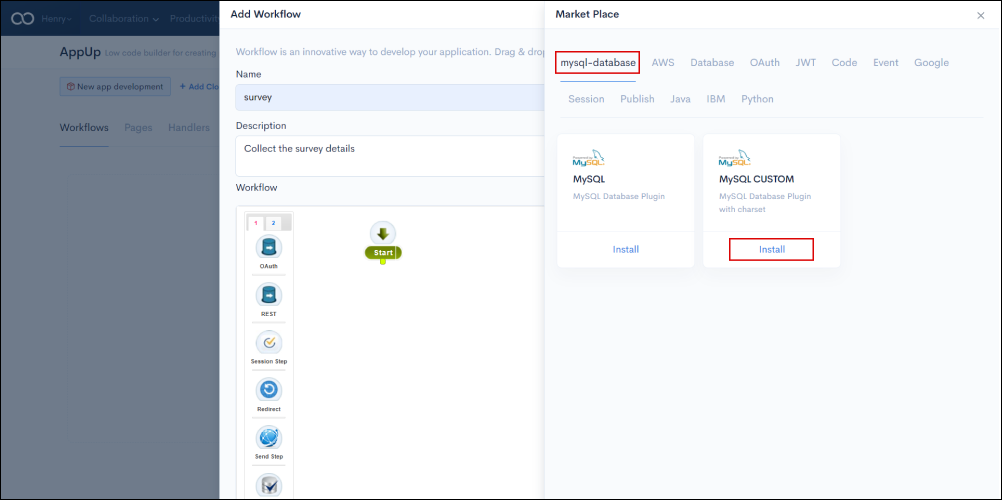
Click on the Install plugins hyperlink to install plugins from Database like MySQL, AWS, OAuth, JWT plugin, Code, Firebase Plugin, Redis Sessions, JDBC Sessions, Kubernetes Deploy Plugin, Java Plugin, IBM Watson, and Python Packages. You can access the workflows with the use of plugins.
After you click on Install Plugins, a new pop-up window called Market Place will appear, displaying all of the Database and other connectors in the list. Select one of the connectors and click on Install.
Create logical flows by connecting different nodes (functional blocks). As you can in the screen below, These are the pre-built functional nodes that can be used to create workflows without writing lines of code. Nodes in the workflow will reduce code complexity and written work. The flow of the algorithm can be created using nodes in the workflow application. You can develop, connect to the database, OAuth, Integration, Execute and deploy using code.
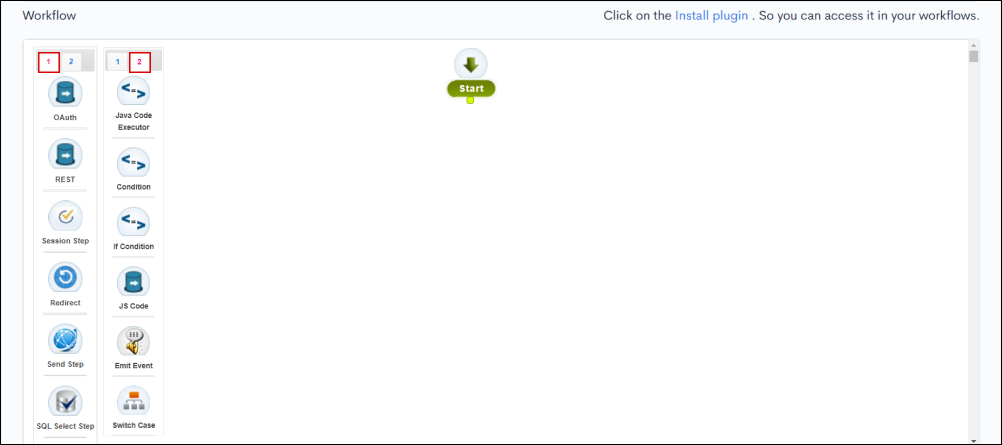
Nodes brief description:
OAuth: Integrate your Authentication with the OAuth node.
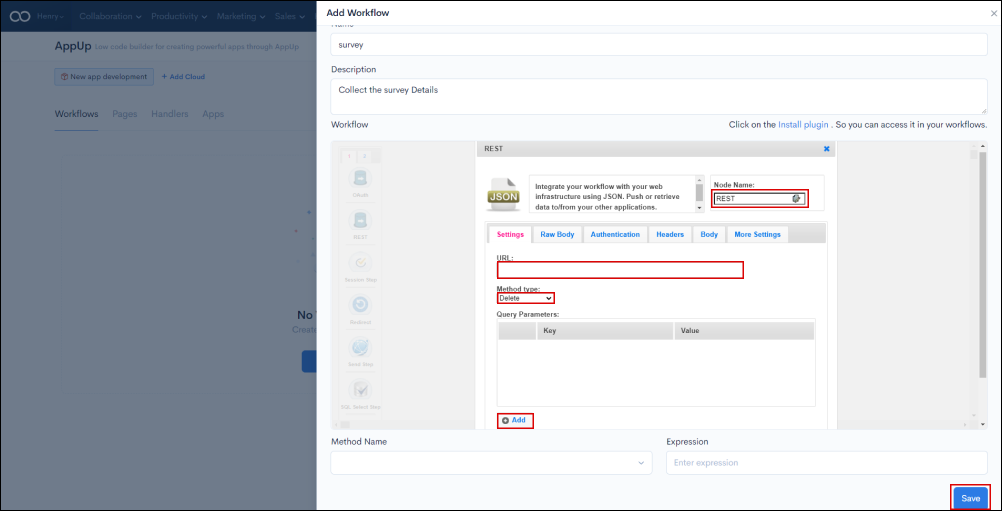
Rest: Integrate your workflow with your web infrastructure using JSON. Push or retrieve data from other applications.
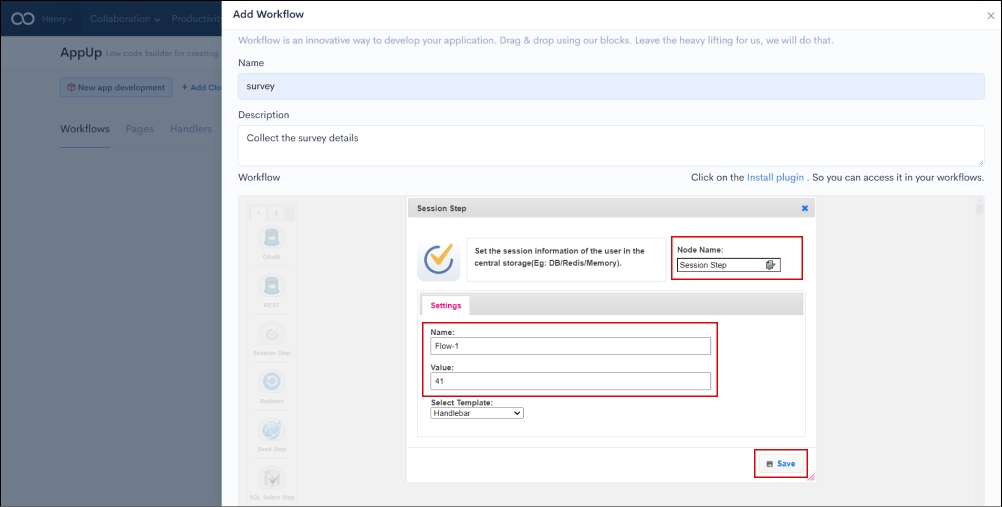
Session Step: Set the session information of the user in the central storage.
Redirect: for the Redirect step.
Send Step: To send the results of the HTTP request to the client.
SQL select step: Execute a select query and fetch the records.
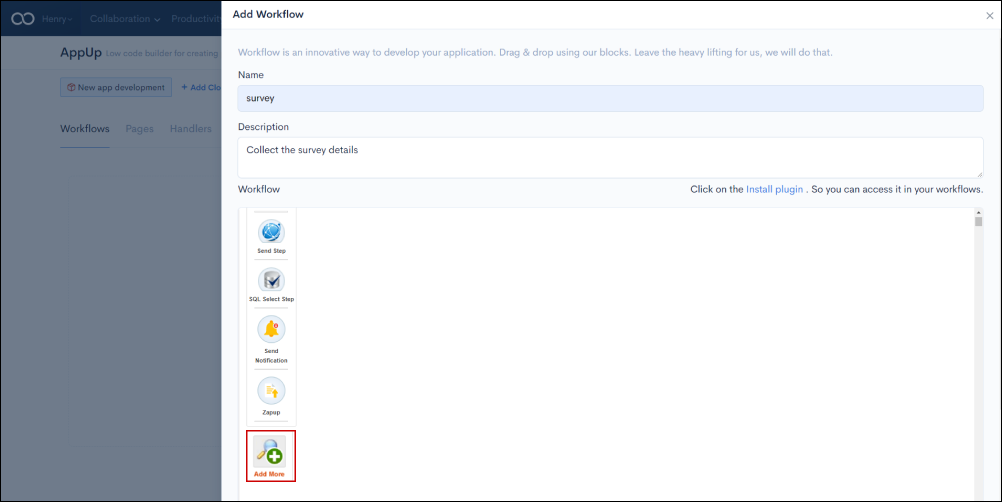
Send notification: To send customized notifications by entering text into the message field.
ZapUp: Set actions from various third-party applications to your flow using the Zapup node.
Add More: You can add more custom nodes by connecting with plugins. For example, you can connect with Database, Auth, Developers, Amazon, Google, and Utilities.
Java Code Executor: It is used to execute Java code.
Condition: Used to check multiple conditions in your workflow.
If Condition: To create an If condition in the loop.
JS Code: Used to execute the uploaded JS Code.
Emit Event: It is an Event Step.
Switch Case: Evaluate a series of conditions and run the code corresponding to the true ones.
Add more: You can add more custom nodes by connecting with plugins. For example, you can connect with Database, Auth, Developers, Amazon, Google, and Utilities. You can add more nodes by clicking on Add More node in the workflow.
There are various types of customized nodes in each form, such as Database, Authentication, Developers, Amazon, Google, and Utilities. You can add the node by clicking on Add this.
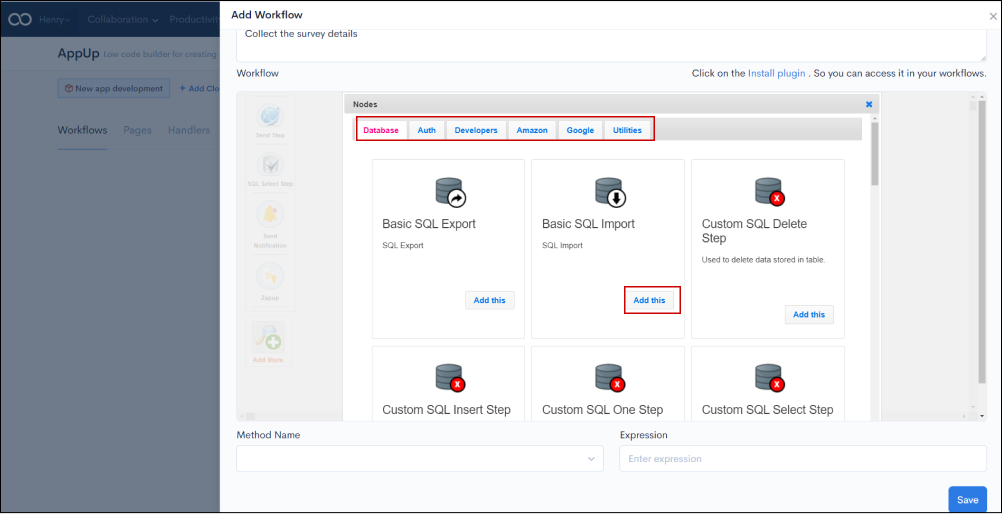
The most commonly used HTTP verbs are listed below in the Methods section, where you can create an application method to work with. Enter the expression of the method followed for the application and click Save
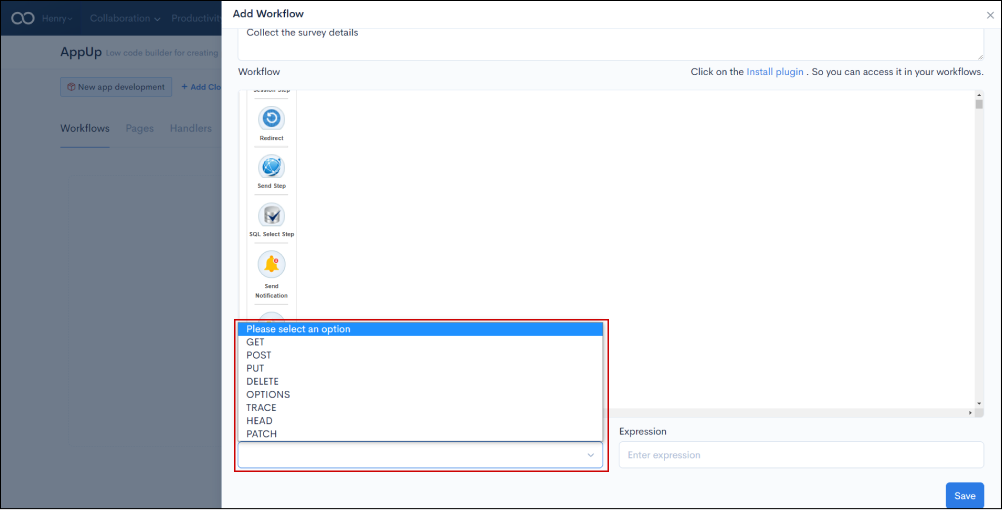
Method Name Brief Overview:
Get: To retrieve or get the data for the application
Post: To update or post any data for the application
Put: To upload or put the data for the application
Delete: To delete data permanently
Options: which is used to create options in the process workflow
Trace: It helps to track the application
Head: To create a header for the application
Patch: Patch code for your application.
Drag and Drop the selected node onto the work field.
A pop-up window will appear, enter the details, and click on the Save button.
Create a workflow with the nodes and connect them all according to the flow.

Custom web application development is a method of designing and developing unique web apps tailored to your specific business needs using prebuilt templates and pages.
A template is a form, mold, or pattern used as a guide for designing web applications and creating interactive forms. You can design the page by choosing appropriate components and grids. You can design by selecting from any of the templates available such as Single Step Page, Page Wizard, and Custom Page.
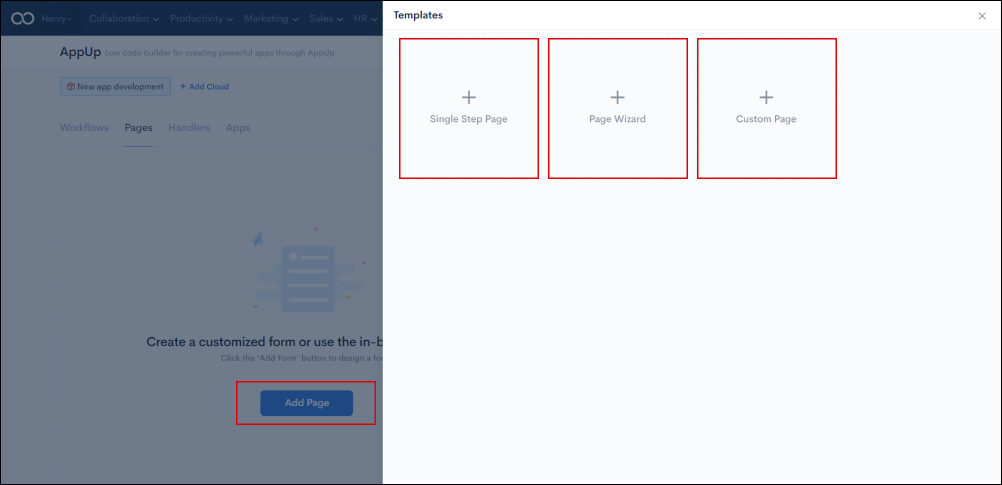
Single Step Page: You can design a web app using components, add fields using smart fields, and create different grids using Grids in the Single Step Page.
Page Wizard: It is made up of a series of input screens or steps that are linked together to allow users to perform infrequently performed tasks.
Custom Page: You can make a custom page by creating a template and writing JavaScript and CSS code on the custom page.
Create a customized Web Page by clicking Add Page. With a few clicks, you can create forms, manage forms, and collect responses. That is, you can design your own forms or use the built-in templates. In form management, you can use features such as preview, clone, and edit. Lastly, send a form via email or embed a form on a website to collect responses. Let’s look at the features required to create the web page.
Components: An application component is a self-contained unit of functionality that includes drag-and-drop functionality.
Once you click on any of the templates, you will see the window below. In the components dropdown is shown on the left, you can see Text Box, Line Text, Link, Paragraph, Heading, List, Radio Group, Checkbox Group, Dropdown, Checkbox, Date Time, Date, Time, Textarea, Number, Phone Number, Upload, Email, Password, Website, Address, Rating, Verify Human, Location, Hidden, Signature, Radio Image Options

Smart Fields: Smart fields allow application users to quickly access specific information that would otherwise require time.
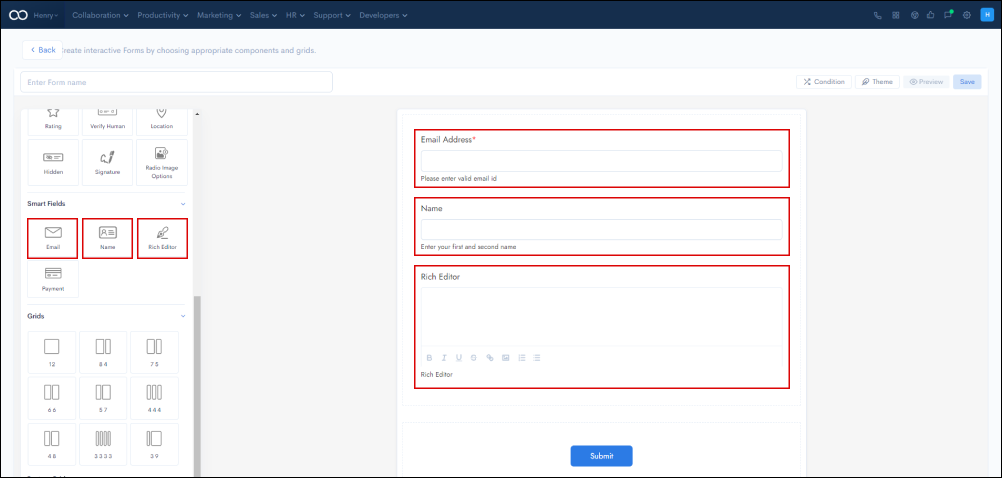
Grids: Using the Grids option in the template, you can easily select the number of grids based on your requirement. You can design with a custom grid up to 12 dimensions.

To create your custom apps faster, you will need a visual designer. However, here you simply need to choose your user interface components, and your application will be built in no time.
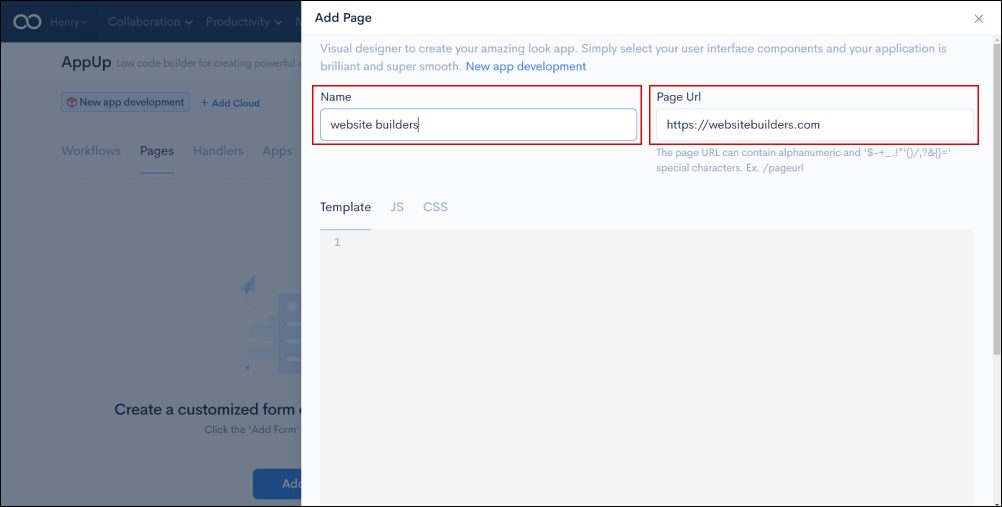
To build an app with a custom page, firstly, enter the name and add a page URL.
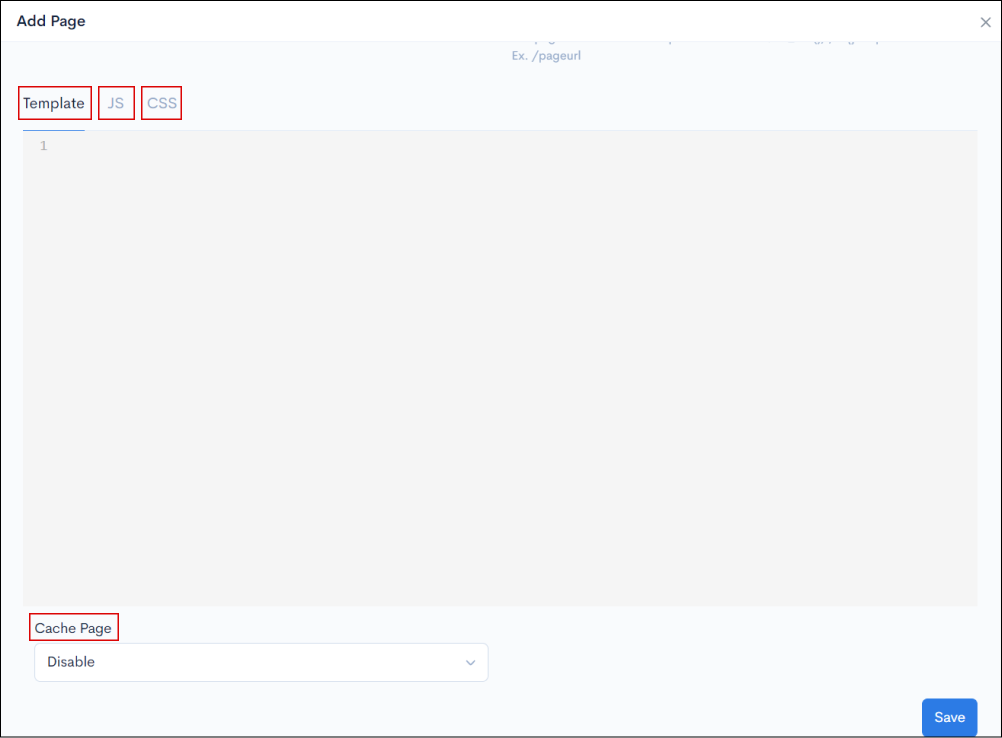
You can use a template, or write Javascript or CSS code. By clicking on the Cache Page dropdown option, you can also disable or enable the cache page.
Handlers are a new way of making AJAX calls, tracking cookies, evaluating forms, and easily building complex logic by dragging and dropping our pre-built nodes. Navigate to the Handler tab and click Add Handlers to get started.

Choose the node to create the algorithm's flow.
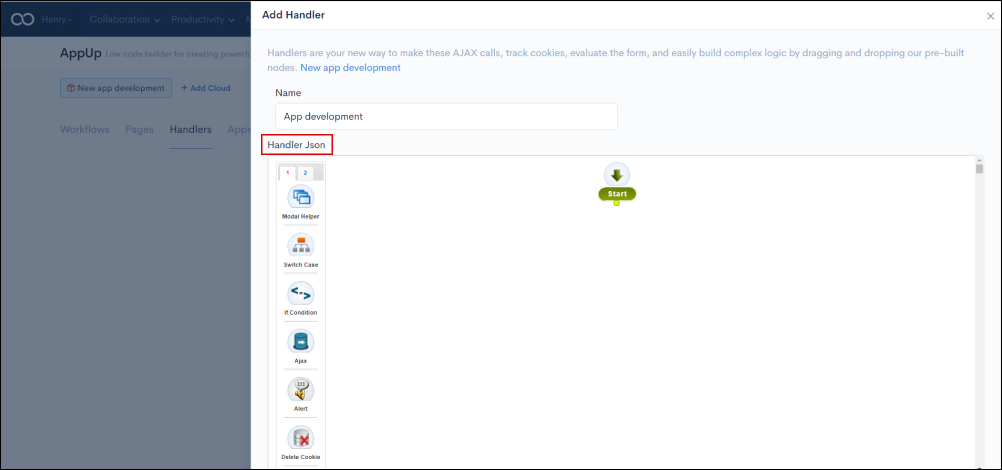
Drag and Drop any node onto the work field by clicking on it. A pop-up will appear, where you need to fill in the details.
Connect each node with the line connectors in the workflow.
Create the flow and connect it to the workflow.

Model Helper: Enter the helper name in the model
Switch Case: Evaluate a series of conditions and run the code corresponding to the true ones.
If Condition: Condition Step.
Ajax: Perform an asynchronous HTTP request within the workflow.
Alert: Enter the title and message in the alert.
Delete Cookie: Deletes the cookie value of the given key.
Delete local storage: Deletes the local storage value of the given key.
Deserialize: Deserializes form fields.
Trigger Event: Trigger browser events from the handler.
Get cookie: Gets cookie from browser based on given parameters.
JS Code: Enter JS Code to execute.
Model: Enter the title and message in the model.
Navigate: Enter the path to navigate.
Serialize: Serializes form fields.
Set-Cookie: Saves given key-value pairs in browser cookies.
Set local storage: Saves given key-value pairs in browser local storage.
Set Var: Step info.
Validate: Validates form fields.
Send notification: Send customized notifications by entering text into the message field.
ZapUp: Set actions from various third-party applications to your flow using the ZapUp node.
Navigate to the Apps tab, where you can integrate the newly built application with other applications. You can integrate with 8 applications that provide full security and you never need to share your personal information.

By simply clicking on the application, you can select as many applications as you need for integration. Choose one of the options such as Amazon SES then enter your credentials to add it to your integrations list (My Integrations).
AppUp by 500apps enables you to design workflows, create web applications, manage your newly built application, deploy it, and integrate it with other applications.
Go to the next level with ![]()
Get 50 other apps with Appup - Join the SaaS Revolution - 500apps, $14.99/user flat pricing, 24/5 Support (Phone/Email/Onboarding)
